In this guide, we'll learn how to enable SiteSEO Abilities and install the MCP Adapter, allowing external AI clients to work directly on your WordPress SEO.
SiteSEO introduces Abilities a revolutionary way to connect your favourite AI models (including Claude, Cursor, Antigravity, VS Code, and Gemini) straight to your website. instead of just chatting with AI, you can now assign actual, hand-on WordPress SEO workloads to these agents just like you would with a human team member.
What Can Your AI Agent Do in WordPress?
Once connected here are a few example of what you can ask your AI to do:
And that's just the start. As the Abilities standard matures, we'll keep expanding what's possible.
How to Connect Your AI Agent to the MCP
The setup is located in the SiteSEO AI Abilities tab. First, toggle the switch to enable this feature. Please note that you will need WordPress 6.9 or higher, but we highly recommend updating to WordPress 7.0+ to ensure you get the full experience across all abilities.
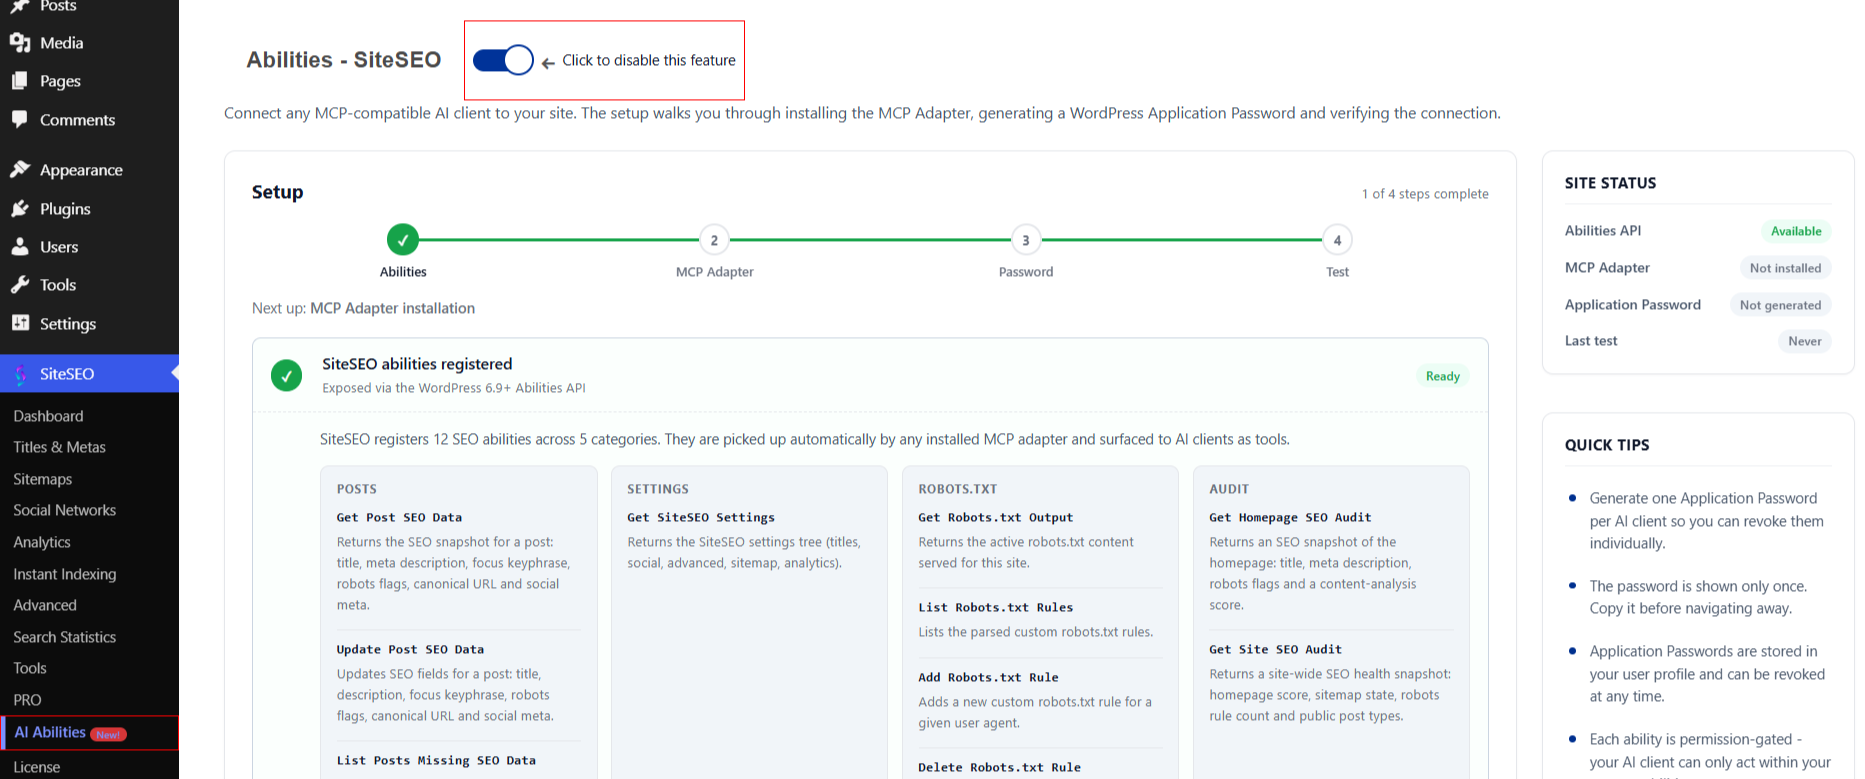
Once you're on a compatible version, Step 1 complete automatically. You can then finish the remaining 3 steps in about 2 minutes.
Step 1: Register SiteSEO Abilities
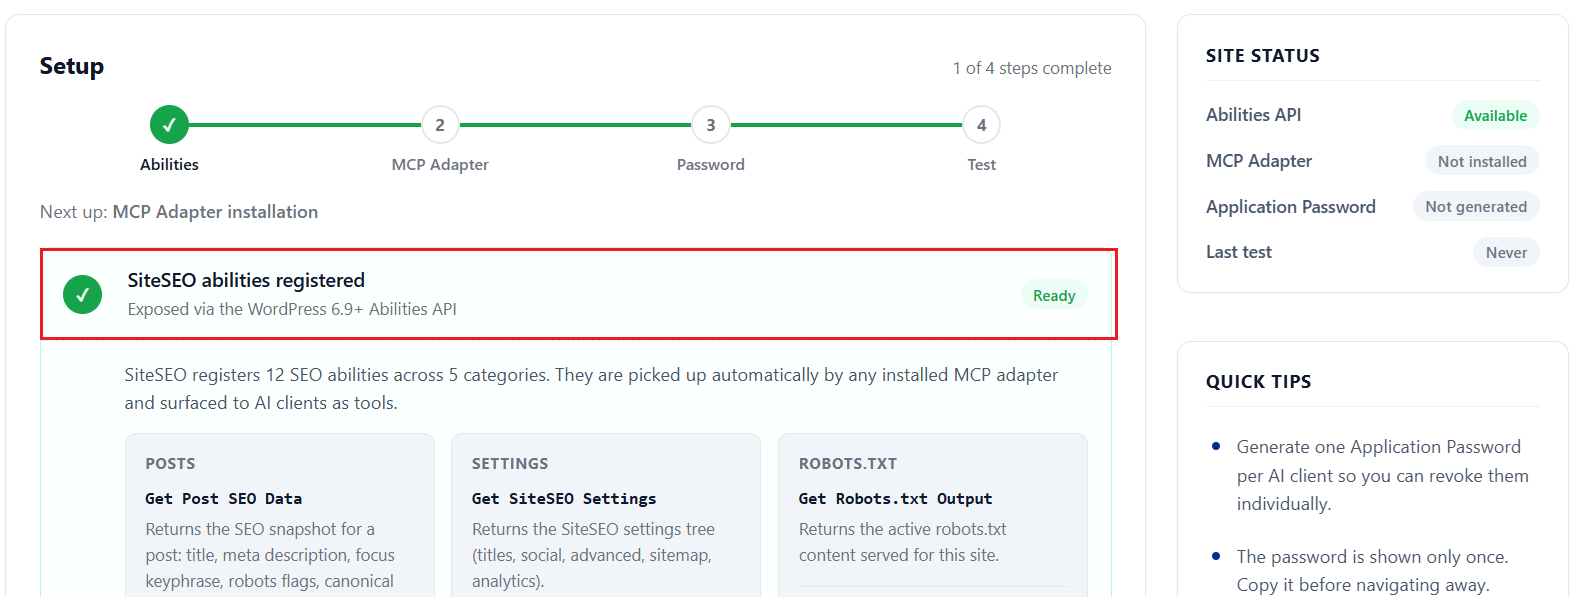
When you open the AI Abilities section on WordPress 6.9 or higher, SiteSEO automatically abilities with the WordPress Abilities API.
You'll see SiteSEO abilities registered with a green checkmark.
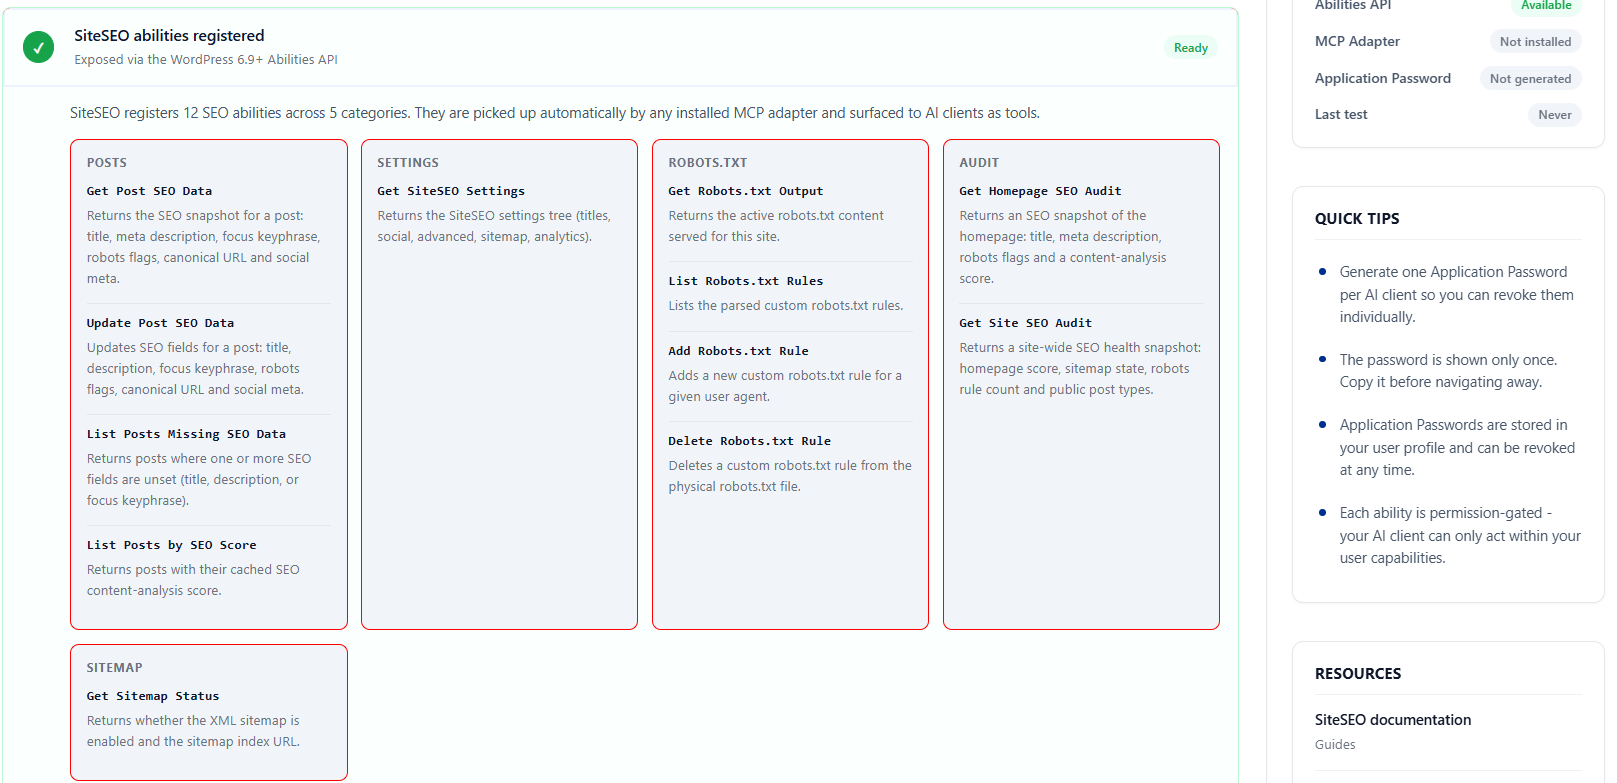
Here, you can browse the entire collection of SiteSEO Abilities at a glance. we recommend reviewing this section to see all the available capabilities and understand exactly how they work.
Step 2: Install the MCP Adapter
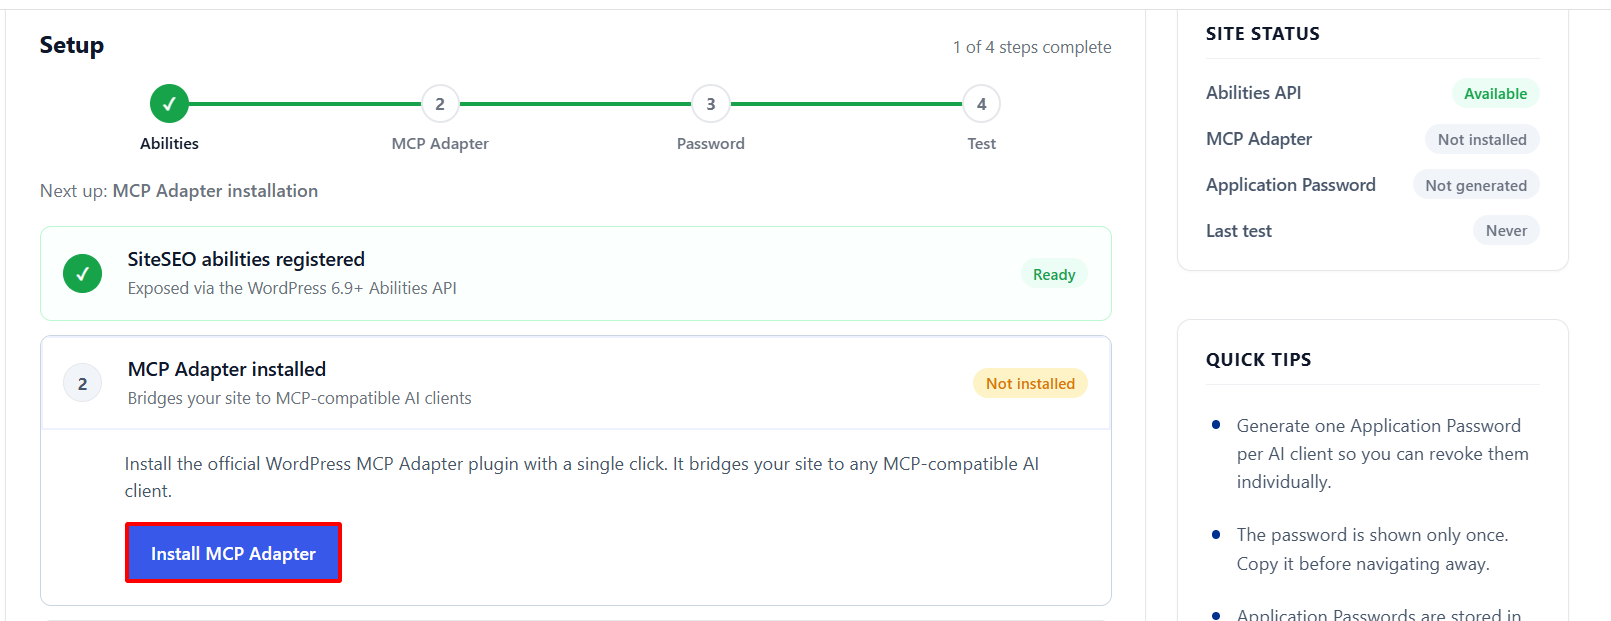
Click Install MCP Adapter and SiteSEO handles everything automatically. There's nothing to configure manually.
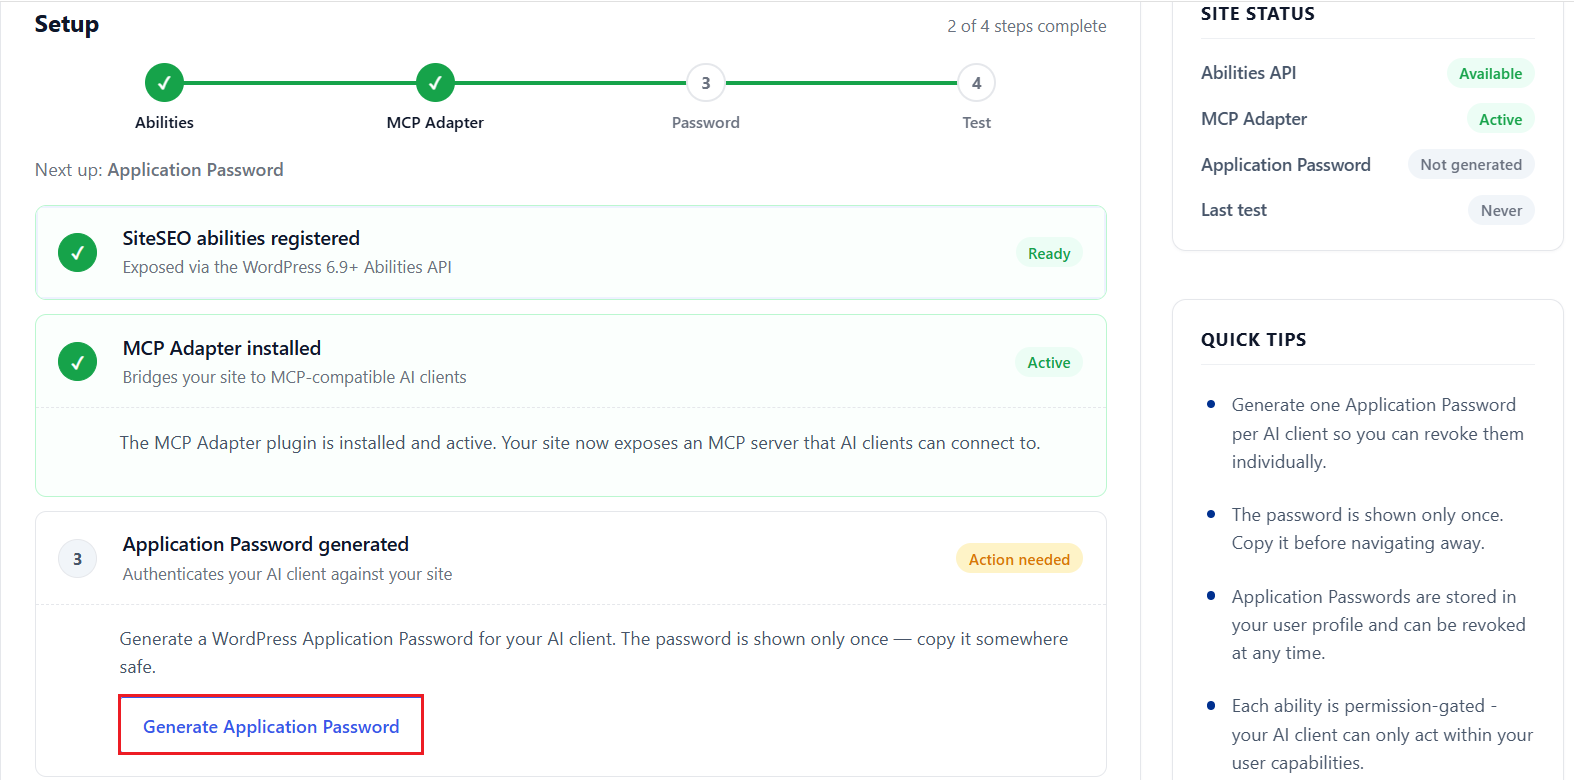
Step 3: Generate an Application Password
An Application Password provides a secure way for your AI client to authenticate with your website. Unlike your standard WordPress login password, this is a unique, dedicated credential linked directly to your user account. For added security, you maintain full control and can easily revoke this access from your WordPress profile at any moment.
Click Generate Application Password. SiteSEO creates the password and pre-fills it into the configuration snippets below.
This is what it looks like after generating:
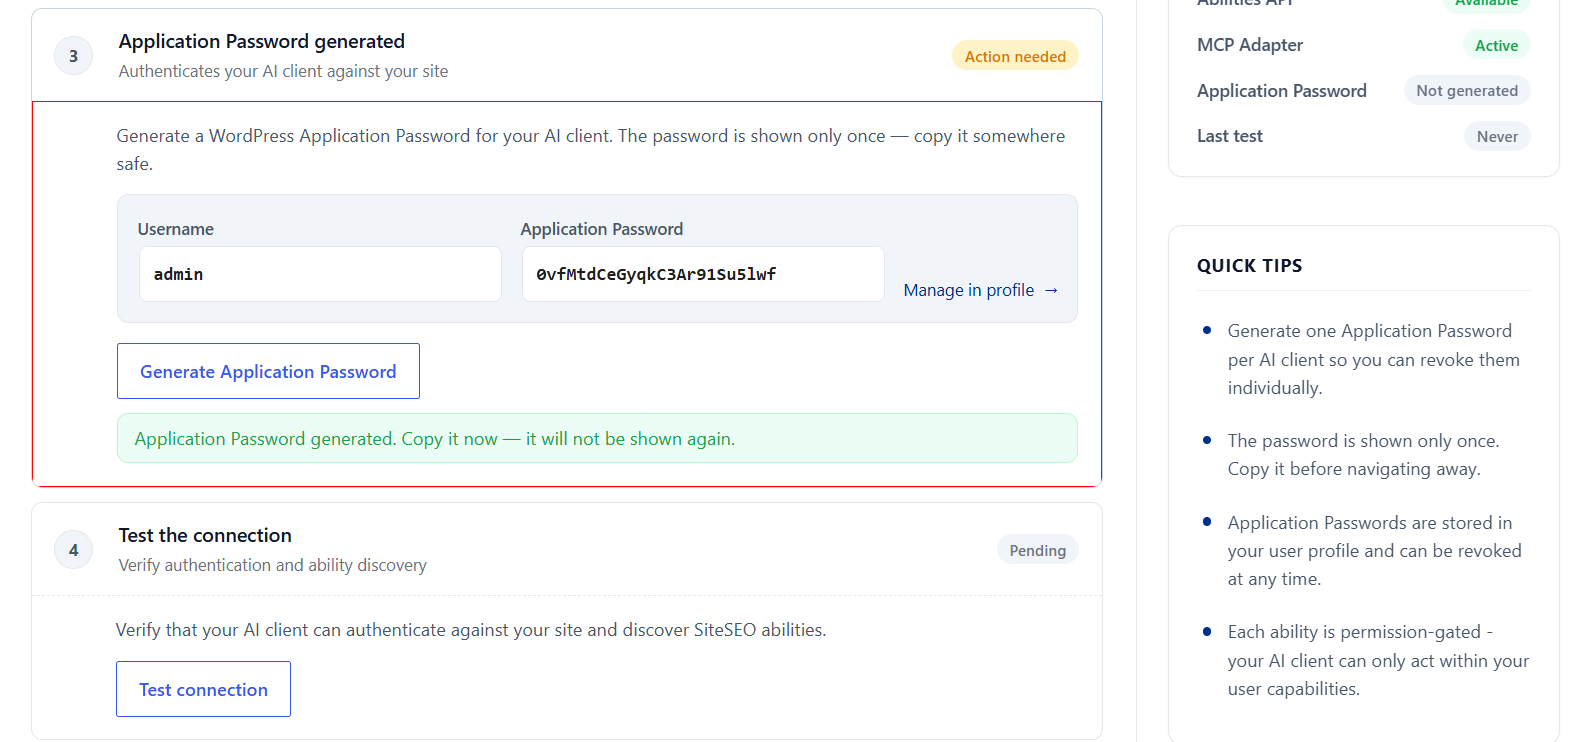
SiteSEO autopopulates this into the connection snippet in a later step, if you're planning to set up your AI client later, copy the password now. WordPress hides it once the session ends.
Step 4: Test the Connection
Click Test Connection. SiteSEO will verify your Application Password and ensure your site can access the registered abilities without any issues.

You'll see "verified" with a confirmation that the connection is ready.
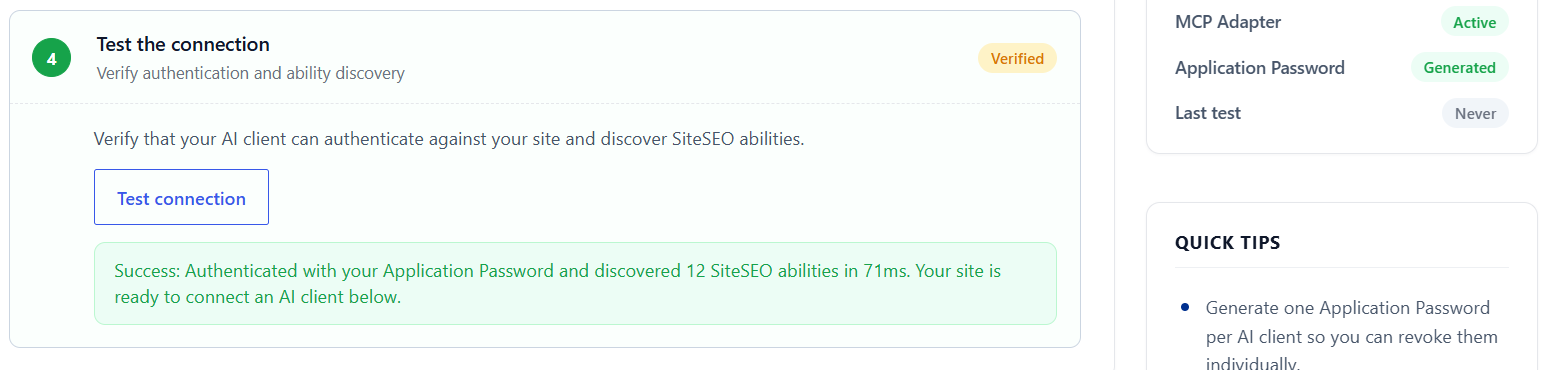
Setup complete! Now for the exiting part, let's see your AI Agents in action.
Here's what a real workflow look like, from copying the snippet to running your first live SEO fix. I'm using Antigravity below, but the steps are virtually the same for any supported AI client.
Connection Antigravity A Full Walkthrough
Once you've completed the 4 steps above, follow these instructions to connect Antigravity to your website. The setup process is virtually identical for other supported AI clients simply select your preferred client tab in the "Connect to AI Client" section.
Step 1: Copy the Command Snippet
Scroll down to the "Connect to AI client" section and select the Antigravity tab. You'll see a configuration snippet with your site URL and Application password already filled in, assuming you're in the same session when you generated it. if not, you can always swap in the new password.
Click the "Copy" Button in the top-right corner of the code block to copy the configuration snippet.
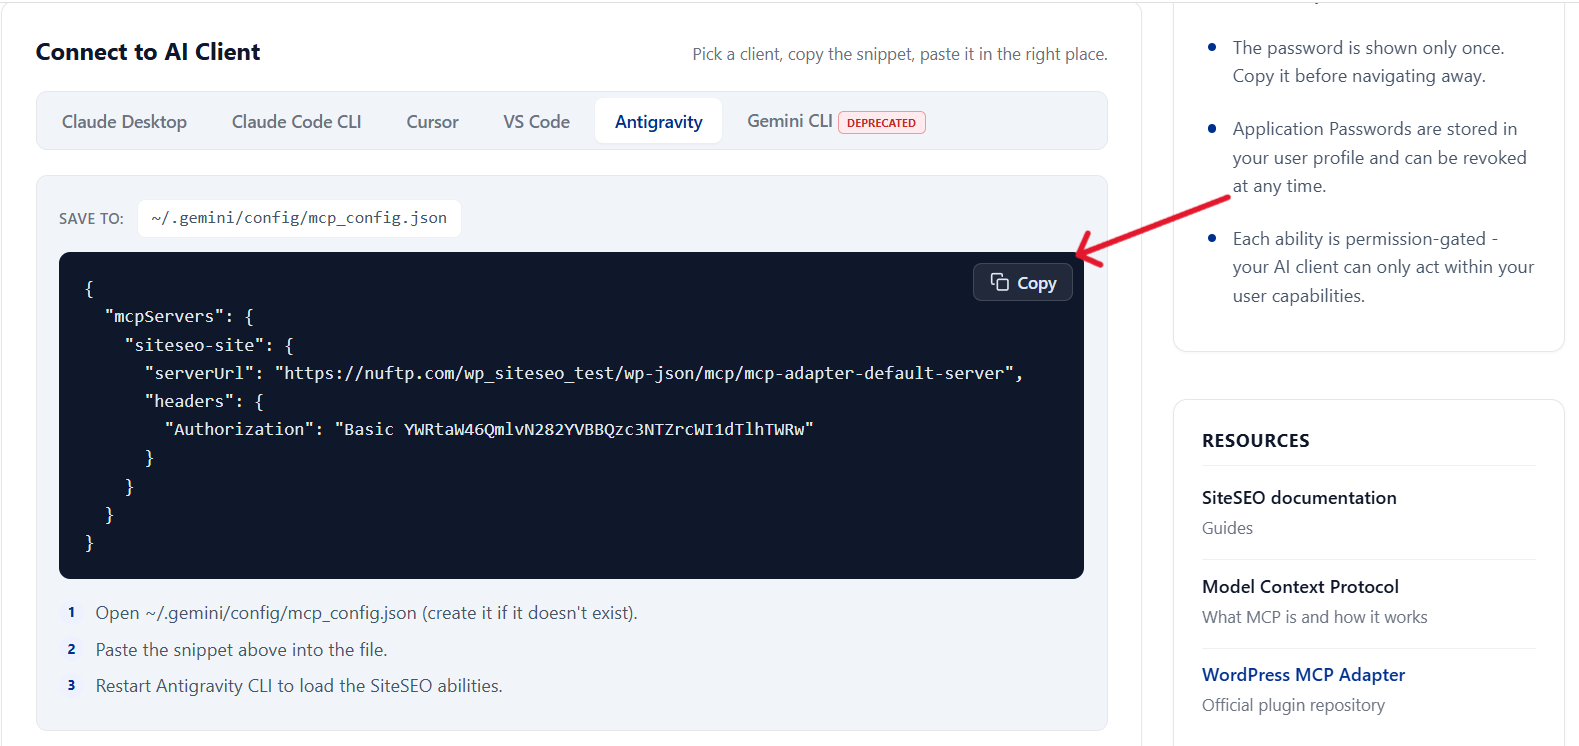
Step 2: Update Configuration File
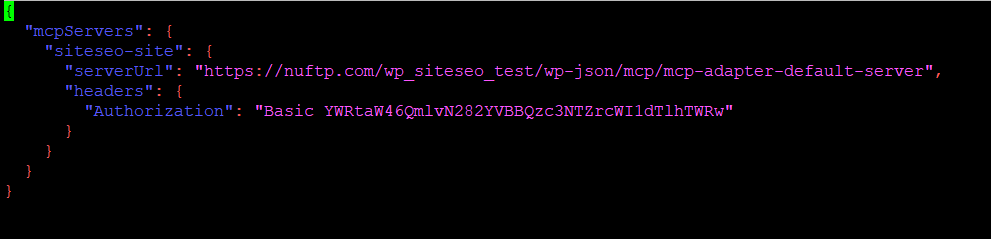
Open your terminal and access the ~/.gemini/config/mcp_config.json configuration file.

Press Enter to open the file in the nano editor, then paste your copied snippet inside. To save your changes and exit, follow these quick shortcut:
Step 3: Start a New Session
Type 'exit', press the Enter key, and start a new Antigravity session. SiteSEO capabilities load automatically when the new session begins.
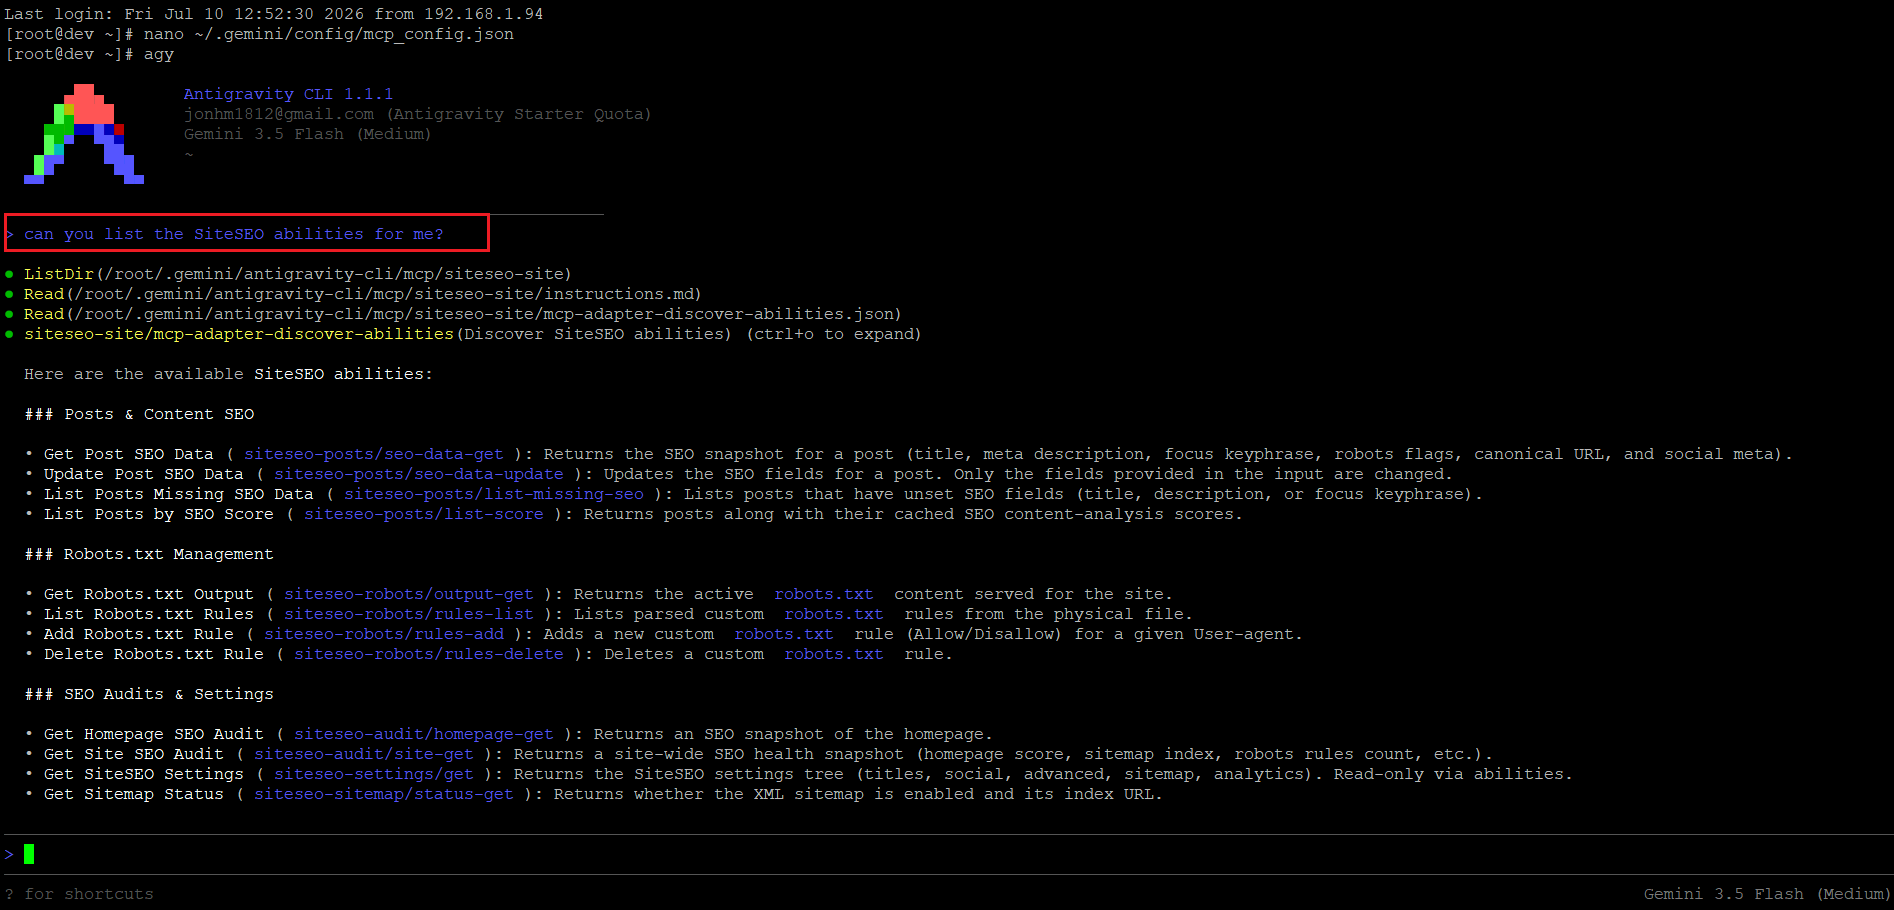
You're connected, Now. You can start asking Antigravity to do things for your WordPress SEO.
Let's look at an example. i'm going to ask Antigravity to modify a post title on my site.
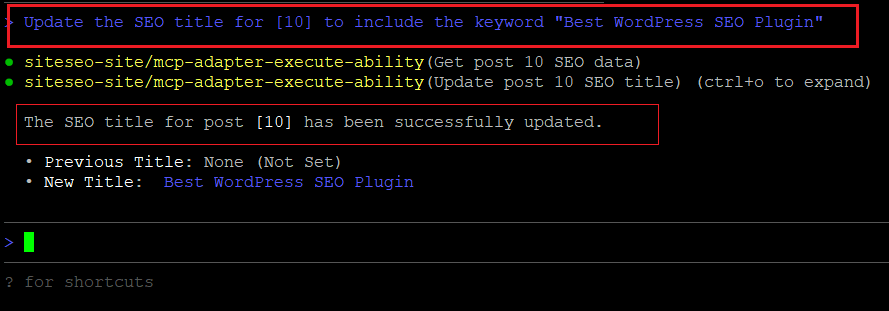
The Title is updated in real-time. Now, here's where the SiteSEO MCP gets really powerful, You can verify the changes directly inside your WordPress post editor.

I've got to say that this is one of the most exciting updates we've made to the plugin yet. AI is already part of how most of us work every day. This just brings that same workflow into your WordPress SEO.
If you face any issues configuration your AI Agent with SiteSEO, You can Contact our support team anytime at [email protected]